Overview
This guide will walk you through the hardware setup for the Enplug WDK4, our Windows Device Kit, which allows you to power up to 4 displays at once.
Contents of this guide
Hardware Requirements
This Windows Device Kit supports a 4 display video wall (4x1, 1x4, or 2x2) or less (3x1, 1x3, 2x1, or 1x2).
-
WDK4 Device (and power supply)*
-
4 displays (and their power cords)
-
1 HDMI cable*
-
1 DisplayPort to HDMI cable*
-
2 USB-C to HDMI cables*
-
Keyboard and mouse
-
Internet connection
*Items included in Enplug Windows Device Kit 4 (WDK4)
Technical Specifications
- Operating System: Windows 10
- Memory: 4GB DDR4 3200MHz SO-DIMM
- Storage: 256GB M.2 SATA SSD
- Wireless Data Network: Intel® Wi-Fi 6 AX200 (2.4GHz/5GHz)
- LAN: Gigabit LAN, Realtek® 8111EP
- Power Supply: 19Vdc, 3.42A, 65W Power Adapter
- Device Dimensions: 11.5 x 11.5 x 4.9 cm
- Weight: 700 g
- Resolution: 4K/60Hz
- Cable Length
- Power: 7.5 ft
- HDMI: 6ft
- USB-C to HDMI: 6ft
- DisplayPort to HDMI: 6 ft
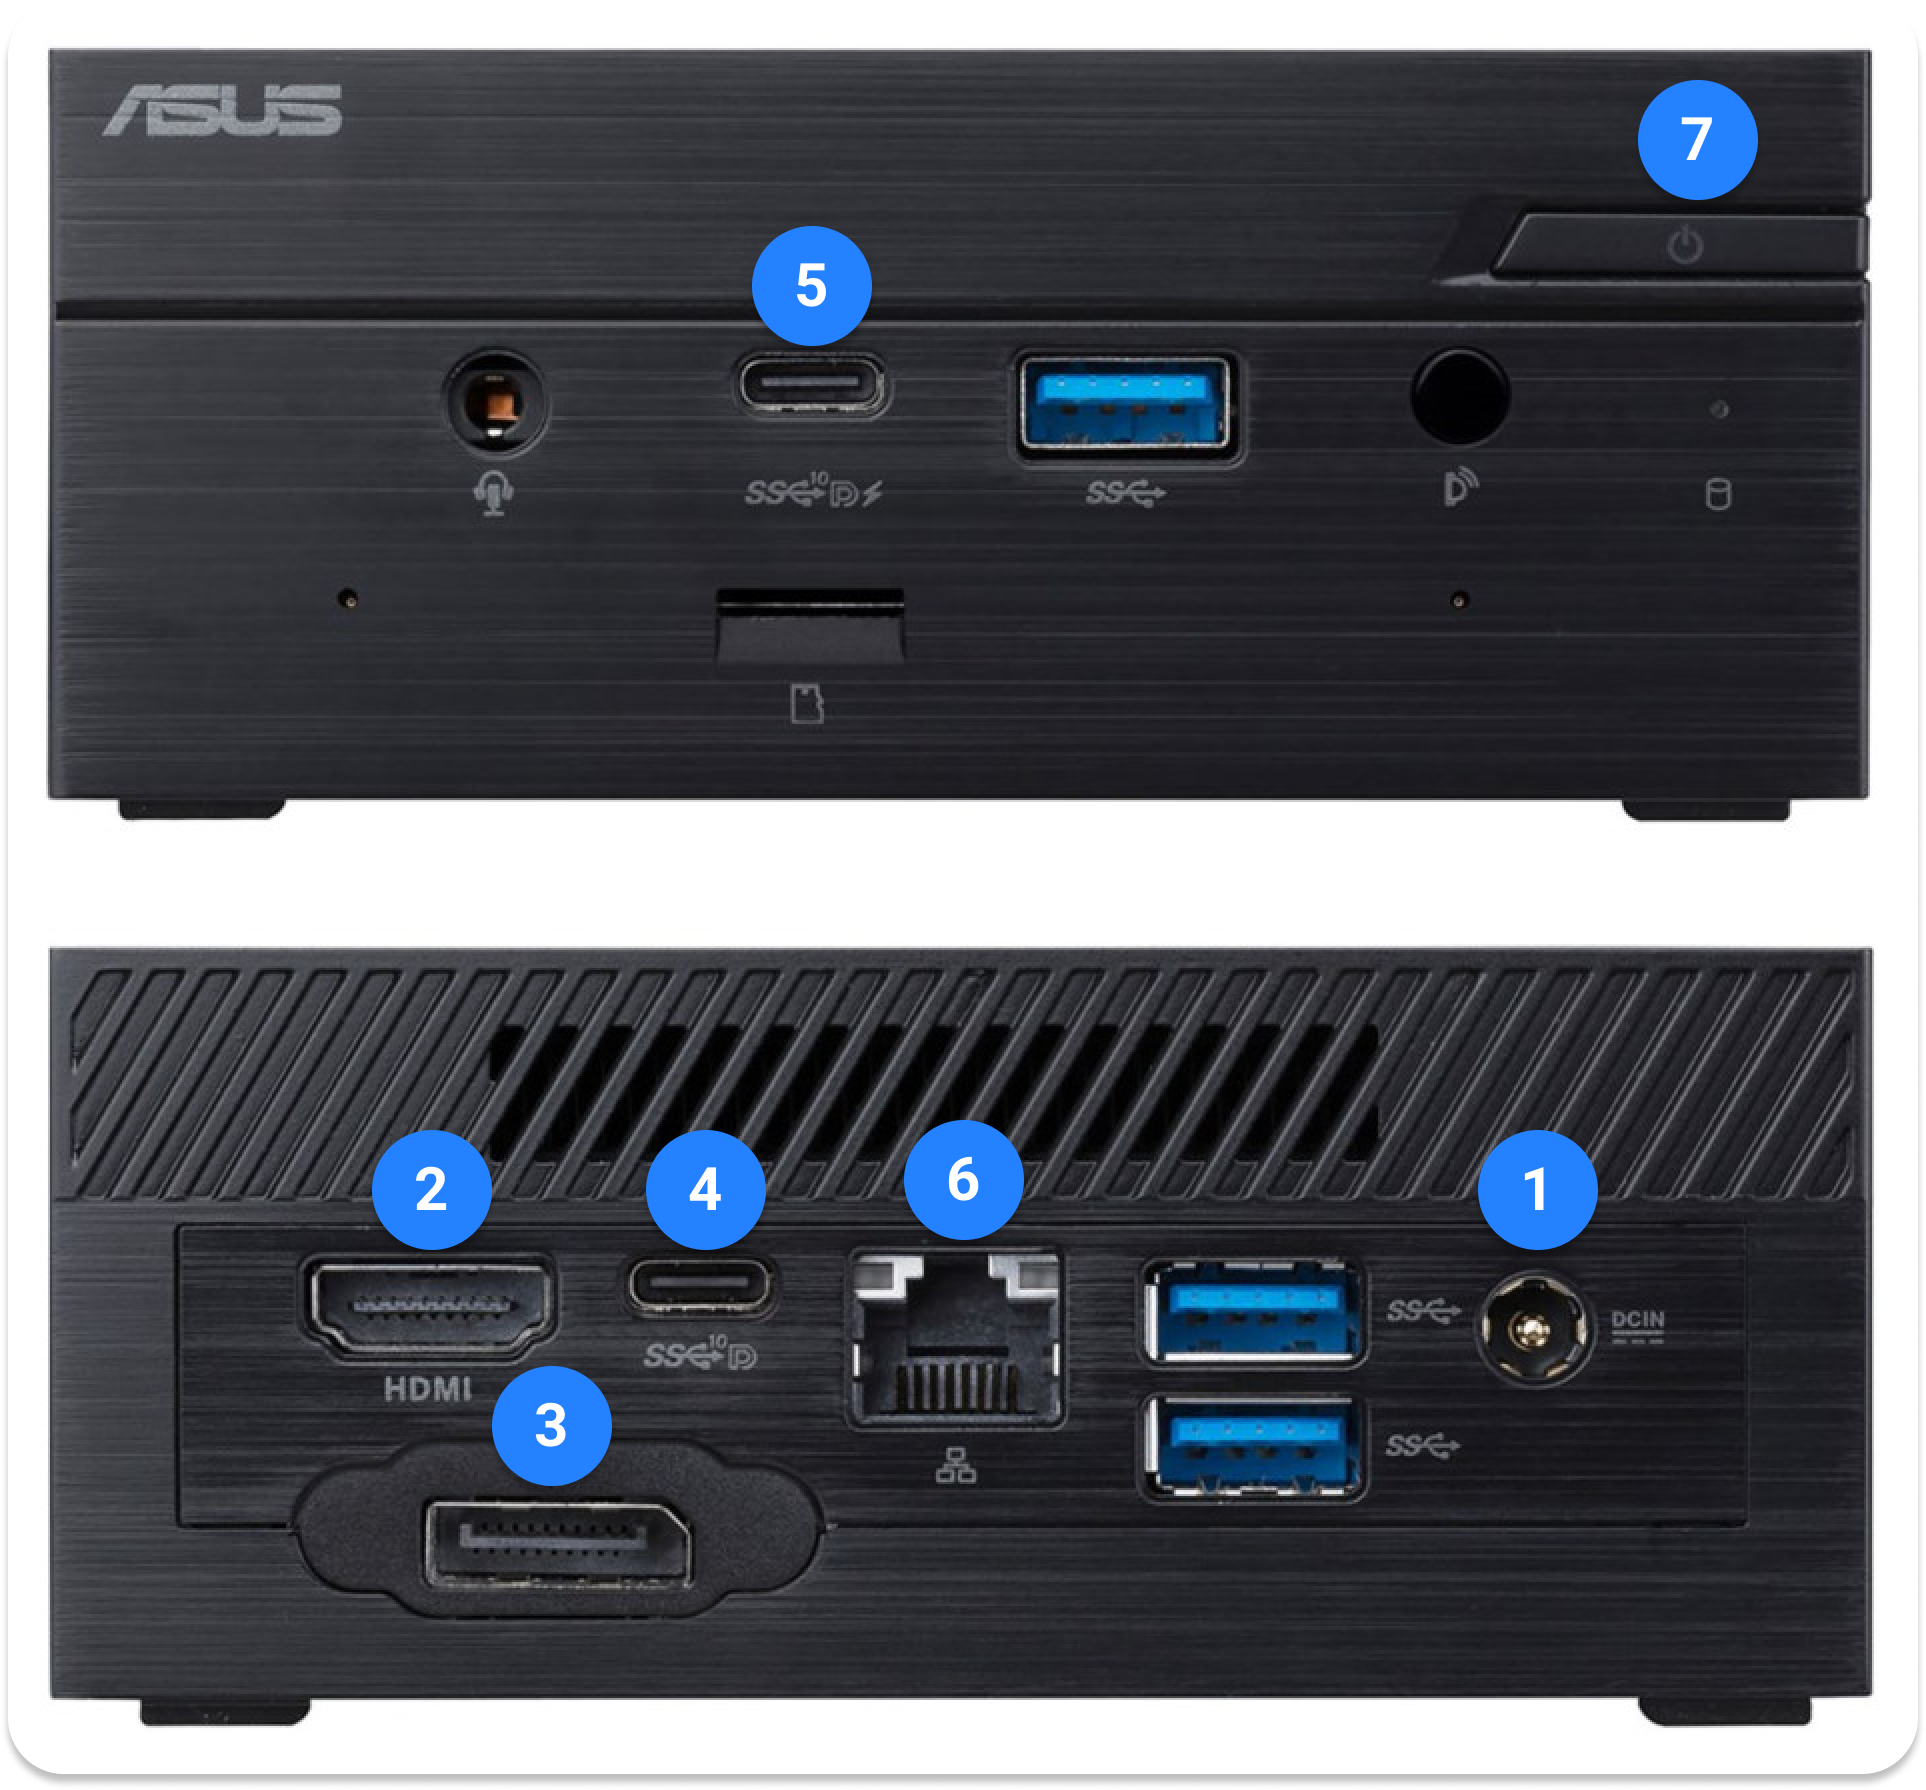
Hardware Setup
-
Plug the WDK4 Device and all the displays into power.
-
Connect the HDMI cable from the back of the WDK4 Device to Display 1.
- Connect the DisplayPort cable from the back of the WDK4 Device to an HDMI port on Display 2.
-
Connect the first USB-C cable from the back of the WDK4 Device to an HDMI port on Display 3.
- Connect the second USB-C cable from the front of the WDK4 Device to an HDMI port on Display 4.
- If you are using Ethernet, connect your Ethernet cable to the WDK4 Device. If you're using Wi-Fi, configure it during the software setup.
-
Turn the WDK4 Device on.
-
After booting up, you will be automatically logged in as the Enplug User.
-
Now you're ready to configure the graphics software to complete your video wall. Check out this guide to do so.